Facebook is a platform that hosts 2.89 billion active users on a monthly basis. It is no exaggeration when I say – your business must be on Facebook.
What does this mean? What does it look like? Let’s dive into how to set up your Facebook Business page as a preneed or final expense insurance agent.
Setting Up Your Profile
There are two different kinds of Facebook profiles. You can create a profile as a person or create a page as a business. You need the latter. Facebook for business holds a variety of tools and features that are unavailable from a personal profile, but don’t worry! Content can be shared between the two if you’ve already curated an audience on your personal page.
Key Set-up Features:
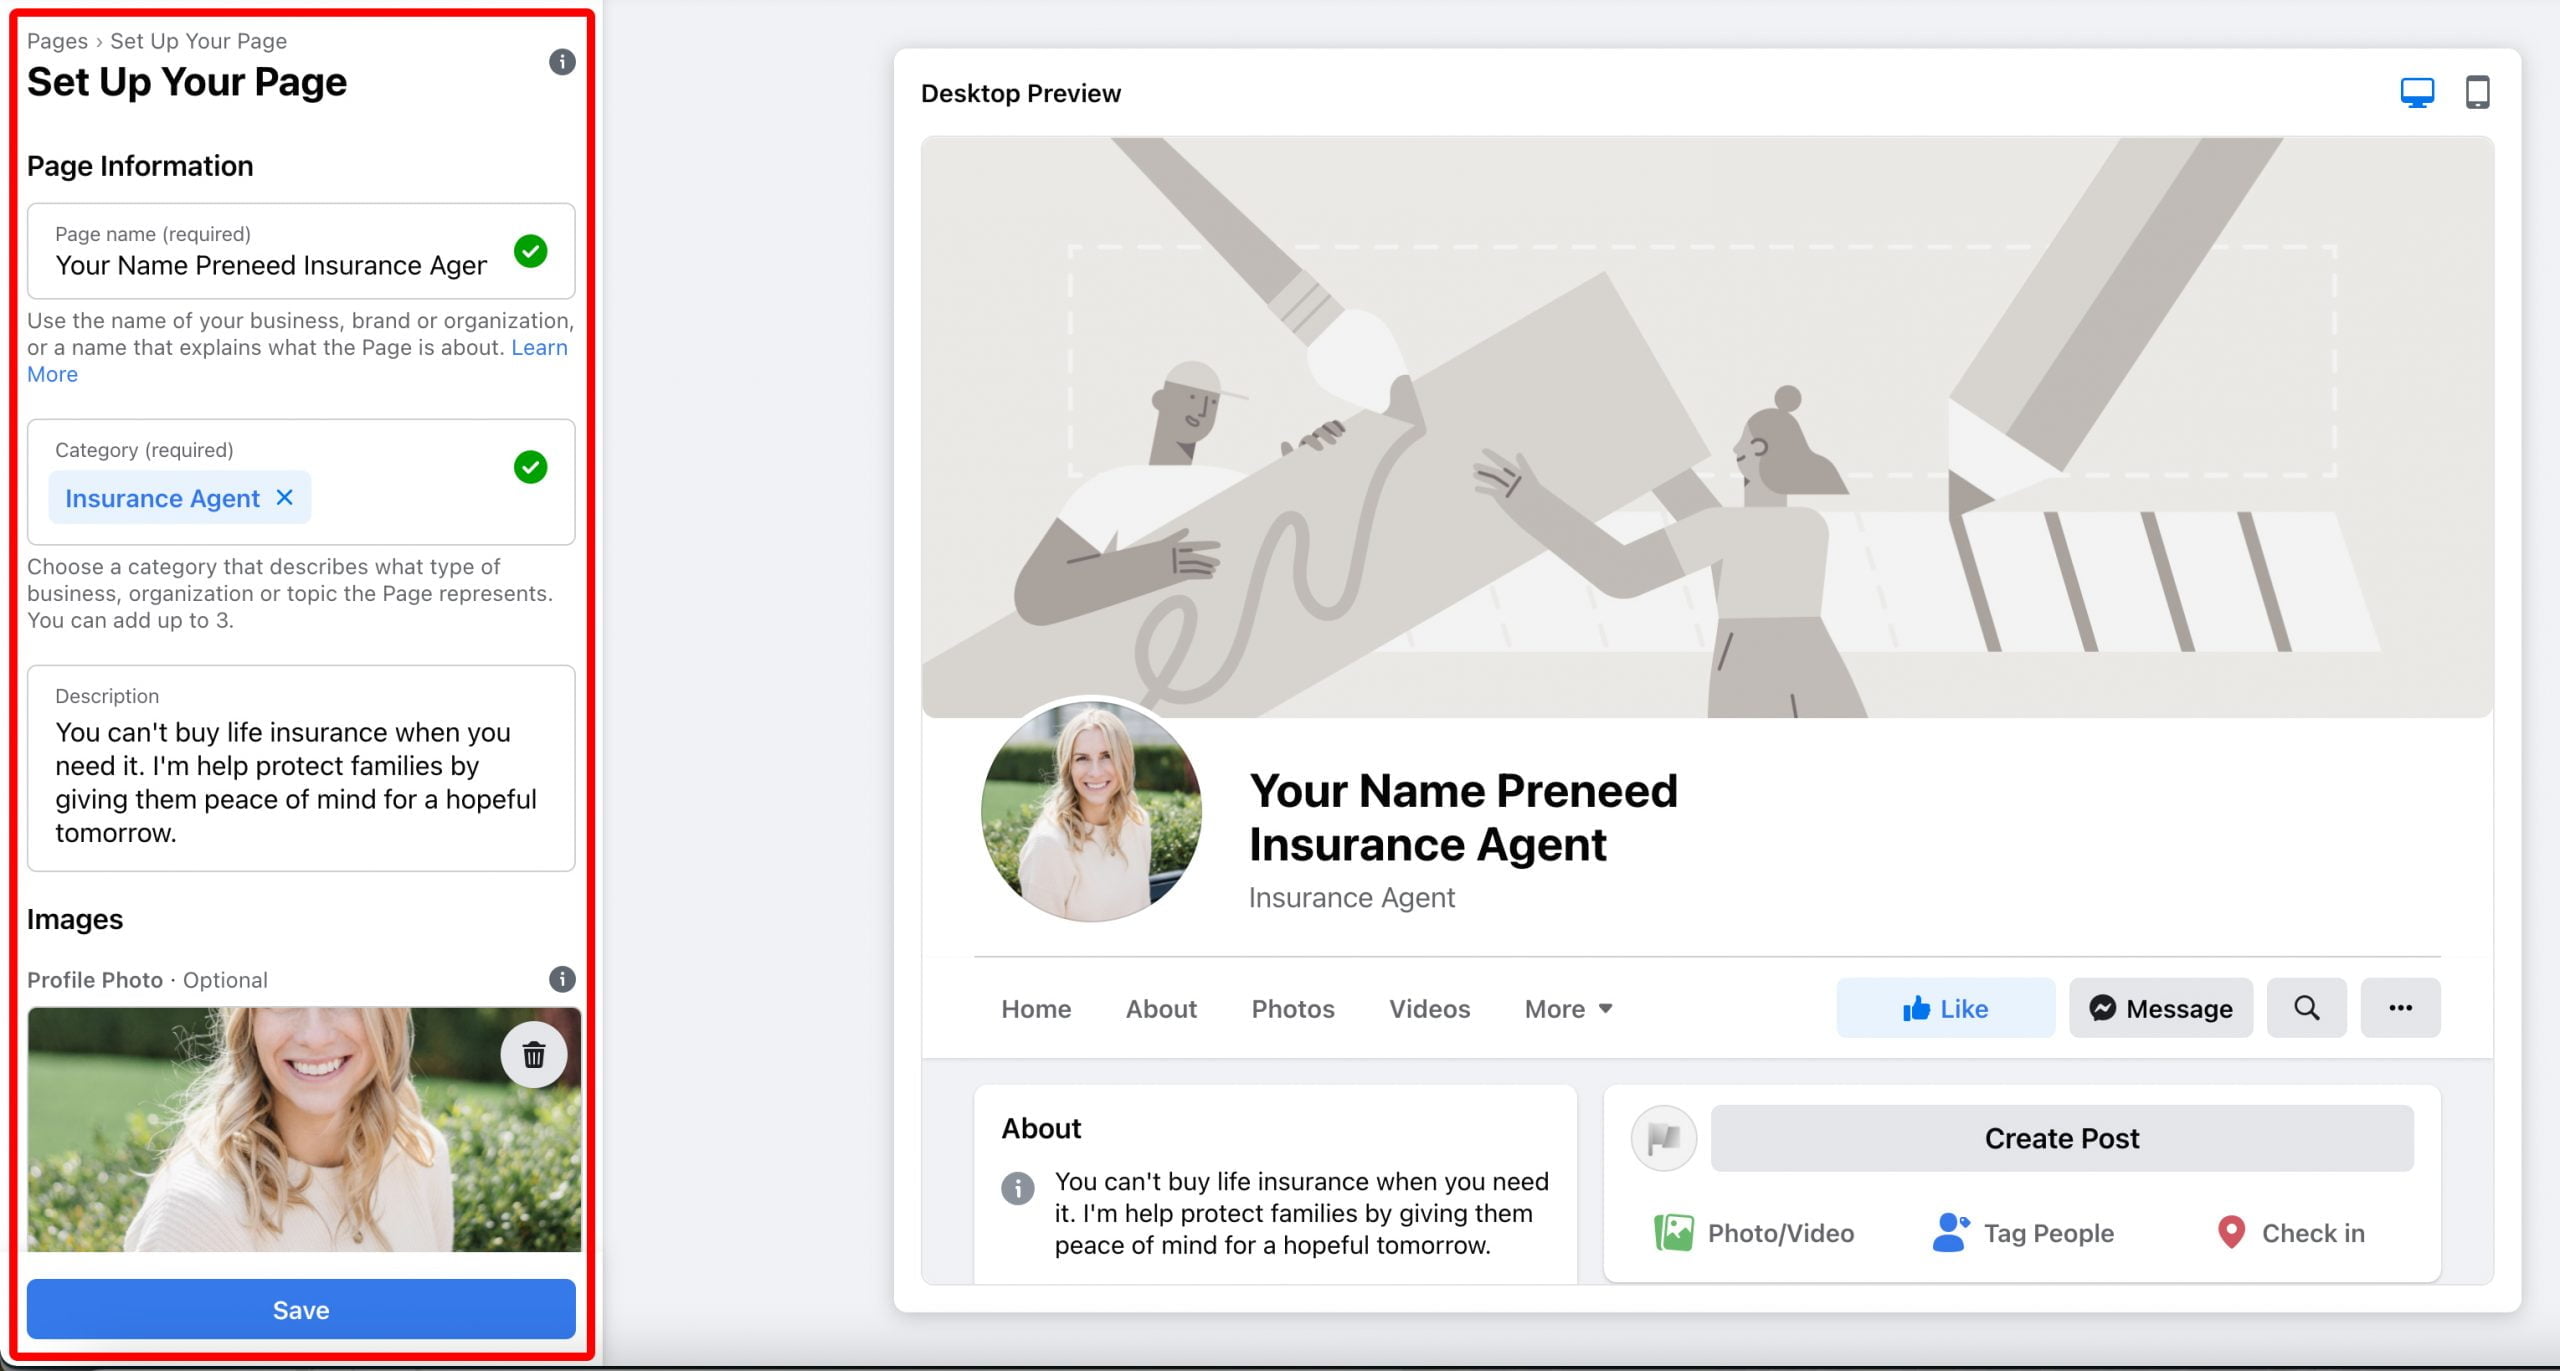
- Name your profile. Start with your name, then add your specialty such as, “Your Name Preneed Insurance Agent.” This helps your profile appear in searches more easily.
- You are the brand! Your profile photo should be a high quality headshot. Instead of cropping a group photo in on your face, snap a quick photo in good lighting with a solid-colored shirt.
- Add a cover photo. If you are an appointed agent with Security National Life, you can access free, professionally designed cover photos through your agent portal.

Optimizing Your Page
With your business page set-up, it’s time to optimize for marketing. You want to make it incredibly easy for people to contact you. Facebook allows you to add a giant button to your page, and this is where you should prioritize your preferred contact method. Whether you prefer a call, email, or quick message, the main priority is that you can respond quickly and efficiently.

Create a good username by clicking on the blue text, “Create @Username.” If you can, keep this username as close to your name as possible. You can try different variations until you find a free username. Take a look at the examples below to see the differences! Creating a custom username will also create a custom Facebook URL for your page. You can link your page in a variety of places such as your email signature, website, etc. Your Facebook URL is “www.facebook.com/YourUserName.” In the example below, it would be, “www.facebook.com/alix.kersavage.preneed.”

When you view your page, you can quickly access a panel of information to improve your profile. Under “Provide Info and Preferences,” you can add website information, location, hours, phone numbers, etc. The more information you can fill out, the better!
Welcome New Followers
You have a great profile, now welcome new followers by starting to post! Talk about why you do what you do, why it’s important, and why your prospective clients NEED it. Let us know if this tutorial was helpful in the comments below!